
Welcome to the world of stitching! This guide will walk you through essential stitches, tools, and techniques. Learn to cast on, troubleshoot common mistakes, and explore various projects.
1.1 What is a Stitch Guide?
A stitch guide is a comprehensive resource that outlines the techniques, tools, and patterns needed for various stitching projects. It serves as a roadmap for both beginners and experienced crafters, providing clear instructions on how to execute stitches, troubleshoot common errors, and understand patterns. Whether you’re knitting, crocheting, or cross-stitching, a stitch guide offers step-by-step tutorials, tips, and tricks to help you master your craft. Think of it as a recipe book for stitching—detailing everything from basic stitches to advanced techniques. By following a stitch guide, you can create beautiful, professional-looking projects with confidence and precision. It’s an essential tool for anyone looking to improve their stitching skills and explore new creative possibilities.
1.2 Importance of a Stitch Guide for Beginners
A stitch guide is invaluable for beginners, as it provides clear, step-by-step instructions for learning various stitching techniques. It helps reduce frustration by breaking down complex stitches into manageable parts, allowing new crafters to build confidence and skills gradually. With a stitch guide, beginners can avoid common mistakes by following tried-and-true methods. It also serves as a reference for understanding basic tools, fabrics, and yarns, ensuring a strong foundation. Whether you’re knitting, crocheting, or cross-stitching, a stitch guide offers a structured learning path, making it easier to progress from simple projects to more intricate designs. It’s an essential companion for anyone starting their stitching journey.
Essential Tools and Materials for Stitching
Stitching requires basic tools like knitting needles, crochet hooks, fabric scraps, and yarn. Scissors, measuring tape, and stitch markers are also essential for smooth progress and accuracy.
2.1 Basic Tools Needed for Stitching
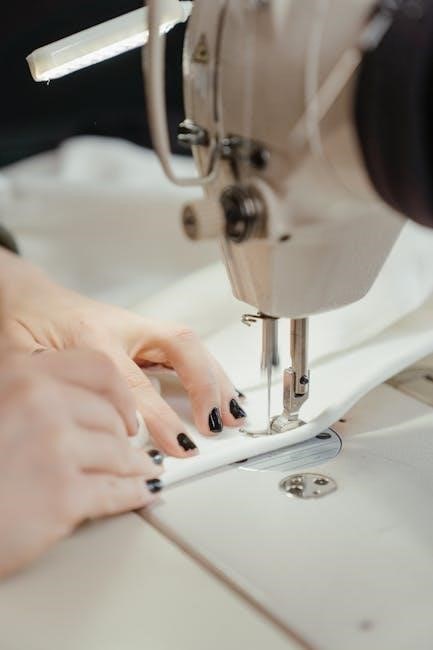
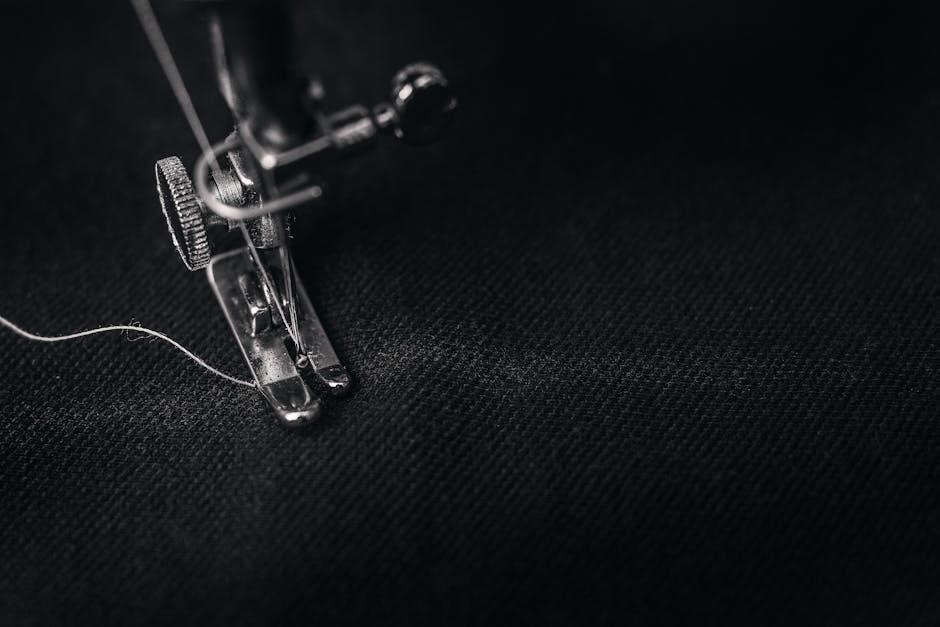
Stitching begins with the right tools. Knitting requires a pair of straight or circular needles, while crochet uses hooks in various sizes. Essential tools include sharp scissors, a tape measure, and a yarn needle for weaving ends. Stitch markers help keep track of patterns, and a measuring tape ensures accuracy in sizing. For cross-stitch, an embroidery hoop or frame is necessary to maintain fabric tension. Fabric scraps, yarn, and thread are the primary materials. These tools collectively provide the foundation for creating beautiful and precise stitching projects. Having these basics ensures a smooth and enjoyable stitching experience, whether for beginners or advanced crafters.
2.2 Choosing the Right Fabric and Thread
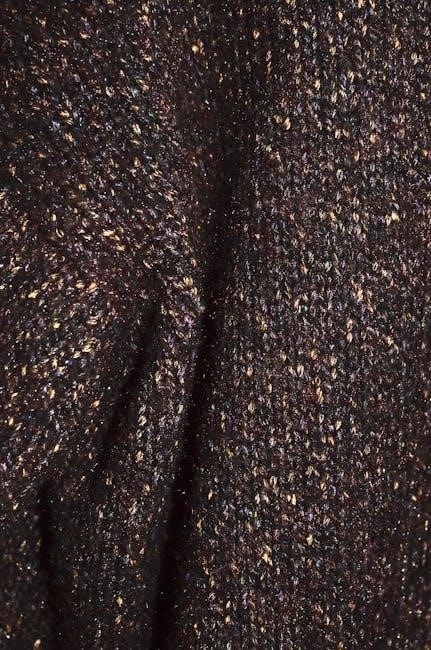
Selecting the right fabric and thread is crucial for your stitching project. For beginners, woven fabrics like cotton or linen are ideal due to their stability. Knit fabrics, such as jersey, are better for garments requiring stretch. Thread or yarn choice depends on the fabric type and desired texture—cotton thread for embroidery, wool yarn for knitting sweaters, or crochet thread for lacework. Always match the thread color and weight to your fabric for a professional finish. Consider the project’s purpose, as some fabrics and threads are more durable or suitable for specific uses. Proper selection ensures your stitches lie evenly and your project looks its best, whether for home decor, clothing, or accessories.
Basic Stitches for Knitting
Master the knit and purl stitches, the foundation of knitting. Learn to cast on and combine stitches to create textures. Gauge ensures proper fit and consistency.
3.1 Casting On and Basic Knit Stitch
Casting on is the first step in knitting, creating the starting loops on your needle. The long-tail cast-on is a popular method for its elasticity and neat edge. Once cast on, the basic knit stitch is formed by inserting the right needle into a stitch, wrapping the yarn, and pulling it through. Keep tension even to ensure fabric consistency. Practice the knit stitch to build confidence. This foundational skill is essential for progressing to more complex patterns. With patience, you’ll master the rhythm of knitting, creating smooth, even fabric. Remember, consistent practice improves stitch quality and overall results;
3.2 Purl Stitch and Combining Knit and Purl
The purl stitch is the reverse of the knit stitch, creating a textured fabric. To purl, insert the right needle into a stitch, wrap the yarn backward, and pull through. Combining knit and purl stitches adds variety to your projects. Start with a knit row, then alternate with a purl row for a smooth fabric. Practice the knit-purl sequence to maintain even tension. This combination is essential for patterns like ribbing or seed stitch. Troubleshoot by checking for dropped or miscounted stitches. Mastering this technique expands your creative possibilities, allowing you to explore more intricate designs and textures in your knitting journey.

Basic Stitches for Crochet
Mastering basic crochet stitches is key to creating beautiful projects. Start with the chain stitch, then progress to single crochet for a solid foundation; These stitches form the basis of countless patterns, allowing you to craft everything from scarves to blankets with ease and confidence.
4.1 Chain Stitch and Single Crochet
The chain stitch is the foundation of most crochet projects, creating a series of connected loops. To start, insert the hook into a stitch, pull up a loop, and draw it through. This creates the first chain. Once the chain is complete, the single crochet follows by inserting the hook into each chain, yarn over, and pulling through both loops. These two stitches are versatile and essential for beginners, forming the base for scarves, dishcloths, and more. Practice ensures smooth transitions and a consistent fabric texture.
4.2 Half Double Crochet and Double Crochet
The half double crochet (hdc) and double crochet (dc) are versatile stitches that add texture and height to projects. The hdc is worked by yarning over, inserting the hook, and pulling up a loop before completing the stitch. The dc, taller than the hdc, involves an additional yarn over. Both stitches are ideal for garments, blankets, and home decor, offering a fabric that is both drapey and opaque. They are excellent for creating intricate patterns and are commonly used in intermediate projects like sweaters and afghans. Mastering these stitches opens up endless possibilities for creative and functional crochet designs.

Understanding Stitch Patterns
Stitch patterns are step-by-step instructions guiding you through specific stitches and techniques. They include abbreviations, symbols, and detailed instructions to create desired fabric and texture.
5.1 Reading Crochet Patterns
Reading crochet patterns involves understanding abbreviations, symbols, and instructions. Patterns typically include materials needed, gauge, and step-by-step stitches. Start by identifying the project’s purpose and required tools. Abbreviations like “ch” for chain and “sc” for single crochet are common. Symbols in diagrams represent specific stitches, guiding your hook placement. Always check the gauge to ensure the finished size matches expectations. Patterns may also specify yarn weight and hook size. For beginners, it’s helpful to practice basic stitches before tackling complex designs. Online tutorials and communities can assist with confusing instructions. Keep track of your progress and adjust as needed for a perfect fit.
5.2 Understanding Cross-Stitch Patterns
Cross-stitch patterns use grids and symbols to guide stitching. Each symbol represents a specific color or stitch type. Start by locating the pattern’s legend, which explains the symbols and corresponding thread colors. Match your fabric’s grid to the pattern’s design, ensuring alignment. Use aida cloth for clarity, as its holes are easy to see. Backstitch is often used for outlines and details. Begin stitching from the center of the design to maintain symmetry. Count carefully to avoid errors. Use a hoop or frame for stability. Follow the pattern row by row, referring to the legend as needed. This method ensures your project mirrors the intended design accurately.

Advanced Stitches and Techniques
Explore texture stitches like Garter and Stockinette, cables, and lace. These techniques add complexity and visual interest to projects, offering depth and sophistication for experienced stitchers.
6.1 Texture Stitches (Garter, Stockinette, etc.)
Texture stitches, like Garter and Stockinette, create unique fabric textures. Garter stitch involves knitting every stitch, producing a bumpy, reversible fabric. Stockinette, with alternating knit and purl rows, yields a smooth, drapey texture. These stitches are versatile for both knitting and crochet, offering visual interest and depth. They are ideal for creating intricate designs and adding layers to projects. By mastering these, crafters can explore complex patterns and elevate their creations. These stitches are essential for advanced projects, providing a foundation for more elaborate techniques like cables and lace. Perfect for blankets, sweaters, and home decor, they add a professional finish to any piece.
6.2 Cable and Lace Stitches
Cable and lace stitches add elegance and complexity to projects. Cable stitches involve crossing stitches over each other, creating a twisted, textured design. They are often used in sweaters, hats, and accessories. Lace stitches, with their airy, open patterns, are perfect for shawls, baby items, and delicate fabrics; Both techniques require patience and attention to detail. Cable stitches use a cable needle to hold stitches temporarily, while lace stitches rely on yarn overs and decreases. These stitches elevate projects, offering a professional finish. Tips include using stitch markers, swatching, and choosing the right yarn for visibility. With practice, crafters can master these intricate designs, creating stunning, sophisticated pieces.
6.3 Specialty Stitches for Embellishment
Specialty stitches add unique flair to projects, offering creative embellishments. These stitches, like the backstitch, long-and-short stitch, and satin stitch, are perfect for outlining designs or creating detailed motifs. They are ideal for customizing fabric, enhancing embroidery, or adding decorative elements to knitting and crochet. Specialty stitches often involve varying needle techniques or yarn manipulation. For instance, the backstitch is great for bold lines, while satin stitch fills areas smoothly. These stitches allow crafters to personalize their work, making each piece truly one-of-a-kind. With practice, these techniques can transform simple projects into stunning, professional-looking creations, adding an extra layer of artistry and sophistication. They are a must-learn for crafters aiming to elevate their skills and creativity.

Troubleshooting Common Mistakes
Identify and fix errors like uneven tension, dropped stitches, and incorrect gauge. Adjustments may involve re-checking patterns or altering needle sizes for a proper fit. Practice makes perfect.
7.1 Identifying and Fixing Common Stitch Errors
Common stitch errors include dropped stitches, uneven tension, and incorrect stitch counts. To fix, first identify the mistake by counting stitches and checking row gauge. If a stitch is dropped, use a spare needle or crochet hook to pick it up. Adjust tension by loosening or tightening yarn as needed. For pattern mismatches, review instructions carefully and ensure all abbreviations are understood. Regularly counting stitches helps prevent errors. Practice fixing mistakes to build confidence and improve overall stitching quality. Remember, errors are part of the learning process and can often be corrected with patience and attention to detail. Keep a notebook to track common mistakes and solutions for future reference.
7.2 Adjusting Gauge for Proper Fit
Adjusting gauge ensures your project fits as intended. Gauge refers to the number of stitches per inch and rows per inch. If your gauge is too tight, use larger needles; if too loose, use smaller ones. Measure gauge by counting stitches in a 4-inch swatch. Compare to the pattern’s gauge to determine adjustments. Sometimes, changing yarn weight or needle material can also help achieve the correct gauge. Regularly check your gauge as you work to maintain consistency. If adjustments are needed, make them evenly to avoid distortion. Proper gauge ensures garments fit well and home decor items lie flat. Practice swatching to master gauge control for professional-looking results.
Projects for Practice
Start with simple scarves and dishcloths, then progress to hats, bags, and blankets. These projects help build skills and confidence in stitching techniques for all levels.
8.1 Simple Projects for Beginners (Scarves, Dishcloths)
Simple projects like scarves and dishcloths are perfect for beginners to practice basic stitches. Start with a scarf using knit or purl stitches for a straightforward project. Dishcloths are great for learning texture stitches like garter or stockinette. Both require minimal materials and are quick to complete, providing a sense of accomplishment. Choose soft, medium-weight yarn and appropriate needles or a crochet hook. Follow a basic pattern or tutorial to guide you through the process. These projects help build confidence and improve stitch consistency. They’re also practical, making them ideal for everyday use or as gifts. Practice regularly to refine your skills and move on to more complex designs.
8.2 Intermediate Projects (Hats, Bags)
Intermediate projects like hats and bags are perfect for refining your stitching skills. Knit a hat by casting on stitches and shaping the crown. Crochet a bag using sturdy fabric and simple stitching. These projects introduce shaping and seaming techniques. Hats allow you to practice working in the round or adding details like pom-poms or buttons. Bags help you master working with thicker yarns and creating functional designs. Both projects are versatile and can be customized with colors and patterns. They’re great for building confidence before tackling more complex designs. Choose patterns that align with your skill level and enjoy creating practical, stylish items for everyday use.
8.3 Advanced Projects (Sweaters, Blankets)
Advanced projects like sweaters and blankets are perfect for mastering complex stitching techniques. Sweaters require shaping, seaming, and precise gauge control to ensure a proper fit. Blankets offer the opportunity to explore intricate stitch patterns, cables, and lace. Both projects allow you to work with larger yarn quantities and refine your ability to handle multiple stitches. Sweaters introduce techniques like armhole shaping and neckline finishes, while blankets let you practice texture and colorwork. These projects are rewarding and challenging, helping you develop advanced skills. Use high-quality yarn and patterns tailored to your expertise level to create beautiful, durable pieces for personal use or as gifts.

Customizing Your Stitch Guide
Personalize your guide by creating unique stitch patterns and adding notes. Make it simple, clear, and tailored to your needs for a deeper understanding of stitching.
9.1 Creating Your Own Stitch Patterns
Creating custom stitch patterns allows you to express your creativity and personalize your projects. Start by experimenting with basic stitches, combining them in unique ways to form intricate designs. For instance, you can blend knit and purl stitches to create textured fabrics or mix crochet stitches for vibrant motifs. Sketching your ideas helps visualize the final result. Once satisfied, write down each step clearly, ensuring your pattern is easy to follow. This process not only enhances your skills but also lets you share your designs with others, making your stitching journey truly fulfilling and distinctive.
9.2 Adding Personalized Notes and Tips
Enhance your Stitch Guide by incorporating personalized notes and tips tailored to your experience. Include reminders about gauge measurements, yarn choices, and needle sizes. Add tips for troubleshooting common mistakes, such as fixing dropped stitches or adjusting tension. Note techniques that worked well for you and those that didn’t. Personalizing your guide makes it a unique resource, reflecting your stitching journey. For example, jot down how you mastered a specific stitch or overcame a challenging pattern. This customization not only aids your progress but also serves as a valuable reference for future projects, making your Stitch Guide truly one-of-a-kind.
Resources for Further Learning
Explore Ravelry for free patterns, join stitching communities, and check out recommended books and websites. These resources offer tutorials, tips, and inspiration for all skill levels.
10.1 Recommended Books and Websites
Expand your stitching knowledge with these curated resources. Ravelry is a must-visit for free knitting and crochet patterns, while websites like Moogly and The Spruce Crafts offer tutorials and tips. For books, “The New Knitting” by Montse Stanley and “The Crochet Bible” by Sue Whiting are excellent for detailed techniques. Websites like Stitch Guide Hub and Craftsy provide video lessons and downloadable guides. Don’t miss communities like Stitching Together, where you can share projects and learn from others. These resources cater to all skill levels, ensuring you always find something new to explore and improve your stitching skills.
10.2 Joining Stitching Communities
Joining stitching communities can enhance your learning journey and connect you with fellow enthusiasts. Platforms like Ravelry and Instagram are hubs for sharing projects and inspiration. Facebook groups such as “Stitching Together” offer support and tips for all skill levels. YouTube channels like “Knitting Help” and “Crochet Geek” provide video tutorials and live sessions. Additionally, online forums like Reddit’s r/knitting and r/crochet foster camaraderie and problem-solving. Participating in virtual stitch-alongs or local meetups can also boost motivation. These communities are invaluable for feedback, advice, and staying updated on trends. Embrace the stitching community to grow your skills and passion!
Mastery of stitching comes with practice and patience. From basic stitches to advanced techniques, this guide has covered essential skills. Explore creative possibilities, personalize projects, and enjoy the journey of stitching. Happy crafting!
11.1 Summary of Key Points
This guide has covered the fundamentals of stitching, from essential tools to advanced techniques. Beginners learned to cast on, knit, and crochet, while more experienced crafters explored texture, cables, and specialty stitches. Understanding patterns, troubleshooting errors, and adjusting gauge were emphasized for precision. Projects ranged from simple scarves to complex blankets, encouraging practice and creativity. Customization tips and resource recommendations provided further learning opportunities. The importance of patience and practice was highlighted throughout. Whether you’re a novice or an expert, this guide offers a comprehensive foundation to enhance your stitching journey and inspire new creations.
11.2 Encouragement to Keep Practicing
Stitching is a skill that improves with time and practice; Celebrate small victories, like mastering a new stitch or completing a project. Don’t be discouraged by mistakes—they’re part of the learning process. Start with simple projects and gradually take on more complex ones. Experiment with different yarns, colors, and patterns to keep your creativity flowing. Join stitching communities for inspiration and support; Remember, the journey is just as rewarding as the finished product. Keep practicing, and soon you’ll see your skills grow. Stitching is not just a hobby; it’s a meditative and fulfilling way to create something truly unique.